Guide to deploying VueJS or any NodeJS project via SSH using Github Actions
Sometimes, you want something as simple as just a standard rsync to a Virtual Machine via SSH every time you push to a git repository. And today I want to show you how to build an automated deployment using GitHub Actions.
One of the things that people working on any JavaScript framework worry about is how to deploy it. There's a lot of options ranging from copying the production build to the servers or using something all-in-one like Cloudflare Pages or AWS Amplify.
But sometimes, you want something as simple as just a standard rsync to a Virtual Machine via SSH every time you push to a git repository. And today I want to show you how to build an automated deployment using GitHub Actions and VueJS (or anything else that similar...)
Setup your secrets.
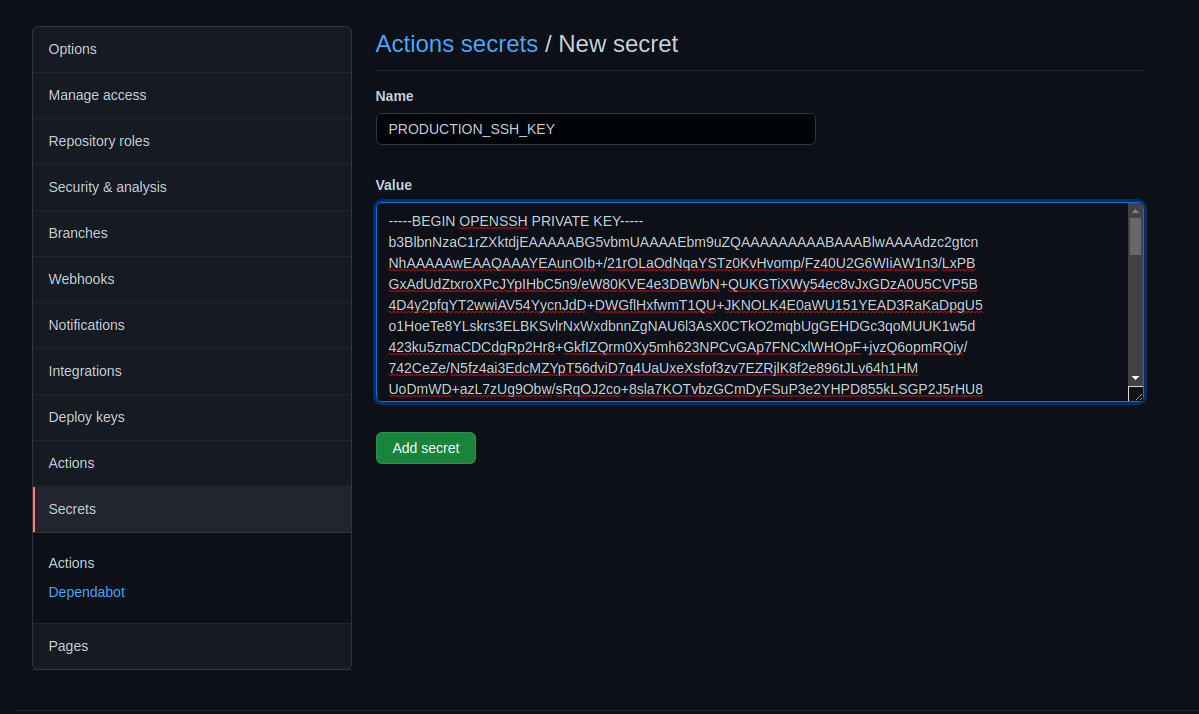
After you create your repository and push your code, open the settings tab and go to the Secrets options. From there you could add a new repository secret, create one for your SSH keys, Server IP, User, and Port.
After that you should have 4 secrets, I named them:
1. PRODUCTION_SSH_KEY
2. PRODUCTION_SSH_USER
3. PRODUCTION_SSH_IP
4. PRODUCTION_SSH_PORT
Create your Actions workflow.
Then go to the Actions tab, from there you should click the "Skip this and set up a workflow yourself ->" button. From there you should remove the default value GitHub place them and rename the workflow for good measure, I renamed it from main.yml to deploy-production.yml
Replace the default value to this code, and replace the /home/vuejsapp/ path to the one you are choosing.
name: Deploy Production

on:
  push:
    branches: [ main ]

jobs:
  deploy:
    name: Deployment
    runs-on: ubuntu-latest

    steps:
      - uses: actions/checkout@v1
      - uses: actions/setup-node@master
      - run: npm install && npm run build
      - name: Install SSH Key
        uses: shimataro/ssh-key-action@v2
        with:
          key: ${{ secrets.PRODUCTION_SSH_KEY }}
          known_hosts: 'placeholder-value'
      - name: Adding Known Hosts
        run: ssh-keyscan -p ${{ secrets.PRODUCTION_SSH_PORT }} -H ${{ secrets.PRODUCTION_SSH_IP }} >> ~/.ssh/known_hosts
      - name: Deploy with rsync
        run: rsync -avz -e "ssh -p ${{ secrets.PRODUCTION_SSH_PORT }}" ./dist/ ${{ secrets.PRODUCTION_SSH_USER }}@${{ secrets.PRODUCTION_SSH_IP }}:/home/vuejsapp/
Let's break down the code above.
on:
  push:
    branches: [ main ]
This part means these actions will run whenever there is a push or change on the main branch, you could change this as you choose for let's say if you are deploying using a different branch such as one for development, staging, and production.
jobs:
  deploy:
    name: Deployment
    runs-on: ubuntu-latest
When GitHub runs this deployment code, you could specify what OS images that the GitHub actions use, please note that this value is for the Actions worker, not your target OS.
    steps:
      - uses: actions/checkout@v1
      - uses: actions/setup-node@master
      - run: npm install && npm run build
      - name: Install SSH Key
        uses: shimataro/ssh-key-action@v2
        with:
          key: ${{ secrets.PRODUCTION_SSH_KEY }}
          known_hosts: 'placeholder-value'
      - name: Adding Known Hosts
        run: ssh-keyscan -p ${{ secrets.PRODUCTION_SSH_PORT }} -H ${{ secrets.PRODUCTION_SSH_IP }} >> ~/.ssh/known_hosts
      - name: Deploy with rsync
        run: rsync -avz -e "ssh -p ${{ secrets.PRODUCTION_SSH_PORT }}" ./dist/ ${{ secrets.PRODUCTION_SSH_USER }}@${{ secrets.PRODUCTION_SSH_IP }}:/home/vuejsapp/
This is the crucial part of building the application code, and deploying it to the server and it's running it in these steps.
- Check out the project to the GitHub actions server.
- Setup the NodeJS, you can specify what version to use by following this example.
- Install the dependencies from package-lock.json and run the build script.
- Setup the SSH Key, and make sure to add the known_hosts value to avoid manual confirmation action.
- Deploying the application using Rsync from the finished build to the server, you could specify which SSH user to use by changing the ubuntu part to your Linux user.
After you finished it, go save and commit the code.
Test and check.

After you commit the action workflow, you should notice a checkmark if your deployment is successful, a yellow dot if it's still running and a red cross if it's failed.
You could check the deployment details by clicking the icon and selecting detail.
In the end, it should look like this.

That's it!
You've successfully created an automated deployment to your server, and hope this guide is useful for you to start deploying your Javascript projects and learning how GitHub Actions could help you achieve that.