A Comprehensive Guide to setting up LEMP Stack (Linux, Nginx, MariaDB, and PHP) in Ubuntu 20.04 LTS.
There's a lot of guides for setting up the LAMP/LEMP stack on the web, and most of them are scattered and sometimes only provide the default config without any optimization. Here I am going to tell you how to install and configure the software that is production-ready and optimized.

There's a lot of guides for setting up the LAMP/LEMP stack on the web, and most of them are scattered and sometimes only provide the default config without any optimization. Here I am going to tell you how to install and configure the software that is production-ready and optimized for daily use.
Let's start with what you need.
- A fairly sized VM, or bare-metal installation for good measure.
- Freshly installed Ubuntu OS and please, please use LTS releases for your production servers.
- Experience in working with command line stuff.
- Patience.
In this tutorial, I am going to use a standard cloud VM from Vultr with these specs:
2vCPU, 4GB RAM and 80GB SSD
You could try and set up your Vultr account by clicking here.
Setup the required repositories.
# Enable secure APT downloads
sudo apt install software-properties-common dirmngr apt-transport-https
# For nginx
sudo add-apt-repository ppa:ondrej/nginx-mainline
# For PHP
sudo LC_ALL=C.UTF-8 add-apt-repository ppa:ondrej/php
# For MariaDB
sudo apt-key adv --fetch-keys 'https://mariadb.org/mariadb_release_signing_key.asc'
sudo add-apt-repository 'deb [arch=amd64,arm64,ppc64el] https://mirror.djvg.sg/mariadb/repo/10.6/ubuntu focal main'As you notice above, I'm using the excellent PPA provided by Ondřej Surý.
The build of Nginx has already been compiled for TLS 1.3 and HTTP/2 support, and his PHP repositories are constantly up-to-date with the latest version and complete extensions support.
For the MariaDB installation, I am using a local official mirror provided by MariaDB based in Singapore, if you want to change to your local mirror you could check here and replace the URL.
Update your system.
After setting up the repositories, you should update your system by using the standard:
sudo apt update && sudo apt -y upgradeSetup all the software.
sudo apt install nginx curl git zip unzip wget mariadb-server mariadb-client havegedThe script above will install a few things.
1. Nginx - the webserver we going to use.
2. curl, git, zip, unzip, wget - This batch of software is used for many PHP extension dependencies.
3. MariaDB - the database we going to use.
4. Haveged - an entropy daemon to help cryptographic randomness especially when running in a low-entropy scenario like a virtual machine.
Next, we are going to set up PHP and choose your flavor 7.4 or 8.0:
# For PHP 7.4

sudo apt install php7.4-common php7.4-cli php7.4-curl php7.4-fpm php7.4-gd php7.4-gmp php7.4-intl php7.4-json php7.4-mbstring php7.4-mysql php7.4-opcache php7.4-readline php7.4-xml php7.4-zip

# For PHP8
sudo apt install php8.0-common php8.0-cli php8.0-curl php8.0-fpm php8.0-gd php8.0-gmp php8.0-intl php8.0-json php8.0-mbstring php8.0-mysql php8.0-opcache php8.0-readline php8.0-xml php8.0-zip
You could add or remove the extension as you choose, the list I provided above is what I encounter daily on setting up applications for clients and such.
Follow this link to check for the available extensions package.
Initial MariaDB setup.
When we finished installing the packages from the previous step, the best practice is always to run the included security tweaks script.
Execute the script:
sudo mysql_secure_installationThen, follow these steps:
- Ignore the "Enter current password for root" by pressing enter, we won't use the root account as by default root uses socket authentication which for most PHP applications only allows database connection by using password auth.
- On the "Set root password?" question just type N and enter.
- From there, just type Y on the rest of the question to securely implement the best-practice changes.
Next, we are going to create a new administrative account for use with the application.
sudo mariadbCREATE USER 'administrator'@'localhost' IDENTIFIED BY 'password';GRANT ALL ON *.* TO 'administrator'@'localhost' WITH GRANT OPTION;Be sure to change the username and password above, next flush the session privileges.
FLUSH PRIVILEGES;After you finish that, you could type exit to return to the terminal and we could try the new account by typing:
mysql -u administratorYou will be prompted to enter your password, and if you're successfully login then congrats, now MariaDB is installed and configured.
Configuring Kernel Variables.
It may sound scary, but if you want to achieve high web concurrency you should try to tune the kernel variable at /etc/sysctl.conf
These scripts are based on a few references (which you should read if you are a performance freak!):
- https://www.nginx.com/blog/tuning-nginx/
- https://www.brendangregg.com/blog/2015-03-03/performance-tuning-linux-instances-on-ec2.html
- https://russ.garrett.co.uk/2009/01/01/linux-kernel-tuning/
- https://fasterdata.es.net/host-tuning/linux/
#
# /etc/sysctl.conf - Configuration file for setting system variables
# See /etc/sysctl.d/ for additional system variables.
# See sysctl.conf (5) for information.
#

### KERNEL TUNING ###

# Increase size of file handles and inode cache
fs.file-max = 2097152

# Do less swapping / Virtual memory
vm.swappiness = 10
vm.dirty_ratio = 60
vm.dirty_background_ratio = 2

# Group tasks by TTY
#kernel.sched_autogroup_enabled = 0

### GENERAL NETWORK SECURITY OPTIONS ###

# Number of times SYNACKs for passive TCP connection.
net.ipv4.tcp_synack_retries = 2

# Allowed local port range
net.ipv4.ip_local_port_range = 2000 65535

# Protect against tcp time-wait assassination hazards, drop RST packets for sockets in the time-wait state
net.ipv4.tcp_rfc1337 = 1

# Helps protect against SYN flood attacks. Only kicks in when net.ipv4.tcp_max_syn_backlog is reached
net.ipv4.tcp_syncookies = 1

# Specify how many seconds to wait for a final FIN packet before the socket is forcibly closed
net.ipv4.tcp_fin_timeout = 10

# With the following settings, your application will detect dead TCP connections after 120 seconds (60s + 10s + 10s + 10s + 10s + 10s + 10s)
net.ipv4.tcp_keepalive_time = 60
net.ipv4.tcp_keepalive_intvl = 10
net.ipv4.tcp_keepalive_probes = 6

### TUNING NETWORK PERFORMANCE ###

# https://www.ibm.com/support/knowledgecenter/en/SSQPD3_2.6.0/com.ibm.wllm.doc/UDPSocketBuffers.html
# On the Linux platform Tx ring buffer overruns can occur when transmission rates approach 1Gbps and the default send socket buffer is greater than 65536.
# It is recommended to set the net.core.wmem_default kernel parameter to no larger than 65536 bytes.
# Transmitting applications can configure the send socket buffer size for InfiniBand, UDP, or TCP protocols independently in a transmit instance.

# Default and Maximum Socket Receive Buffer
net.core.rmem_default = 8388608
net.core.rmem_max = 16777216

# Default and Maximum Socket Send Buffer
net.core.wmem_default = 65536
net.core.wmem_max = 16777216

# Increase the maximum amount of option memory buffers
net.core.optmem_max = 65536

# Increase number of incoming connections
net.core.somaxconn = 4096

# Increase number of incoming connections backlog
net.core.netdev_max_backlog = 100000

# Maximum number of microseconds in one NAPI polling cycle.
# Polling will exit when either netdev_budget_usecs have elapsed during the poll cycle or the number of packets processed reaches netdev_budget.
net.core.netdev_budget = 60000
net.core.netdev_budget_usecs = 6000

# Increase the tcp read and write-buffer-space allocatable
net.ipv4.tcp_rmem = 4096 1048576 2097152
net.ipv4.tcp_wmem = 4096 65536 16777216

# Increase the tcp read and write-buffer-space allocatable (default = 4096)
net.ipv4.udp_rmem_min = 8192
net.ipv4.udp_wmem_min = 8192

# Increase the maximum total buffer-space allocatable
# This is measured in units of pages (4096 bytes)
#net.ipv4.tcp_mem = 786432 1048576 26777216
#net.ipv4.udp_mem = 65536 131072 262144

# Make room for more TIME_WAIT sockets due to more clients,
# and allow them to be reused if we run out of sockets
net.ipv4.tcp_max_syn_backlog = 30000
net.ipv4.tcp_max_tw_buckets = 2000000
net.ipv4.tcp_tw_reuse = 1
net.ipv4.tcp_slow_start_after_idle = 0
/etc/sysctl.conf
After changing the value in /etc/sysctl.conf, you could enable it by using the following commands:
sudo sysctl -pConfigure file-max limit for Nginx.
By default, the ulimit value or process file-max value for Nginx is 1024.
We could change that by modifying /etc/security/limits.conf file and add this line.
* soft nofile 65535
* hard nofile 65535
Update /etc/default/nginx and add this value
ULIMIT="-n 65535"On the first installation, the Nginx service wasn't enabled automatically at startup, you could enable the service by executing the command below.
sudo systemctl enable nginx
sudo systemctl start nginx
Update /etc/systemd/system/nginx.service or /lib/systemd/system/nginx.service by adding LimitNOFILE=65535 under the [Service] block, then reload the systemd by executing this command
sudo systemctl daemon-reload
sudo service nginx restart
After changing the value, you could validate the config by running this command
cat /proc/`ps -aux | grep -m 1 nginx | awk -F ' ' '{print $2}'`/limits | grep "open files" | awk -F ' ' '{print $4}'

# The output should be: 65535
Tuning Nginx
Next, let's configure the /etc/nginx/nginx.conf file to start optimizing the default settings based on the configuration below.
user www-data;
worker_processes 2;
worker_rlimit_nofile 65535;
pid /run/nginx.pid;
include /etc/nginx/modules-enabled/*.conf;

events {
	worker_connections 4096;
	use epoll;
	multi_accept on;
}

http {

	##
	# Basic Settings
	##

	sendfile on;
	tcp_nopush on;
	tcp_nodelay on;
	types_hash_max_size 2048;
	server_tokens off;

	# server_names_hash_bucket_size 64;
	# server_name_in_redirect off;

	##
	# Timeout Settings
	##

	client_body_timeout 12;
	client_header_timeout 12;
	keepalive_timeout 15;
	send_timeout 10;

	##
	# Buffers Optimization
	##

	client_body_buffer_size 10K;
	client_header_buffer_size 1k;
	client_max_body_size 8m;
	large_client_header_buffers 2 1k;

	include /etc/nginx/mime.types;
	default_type application/octet-stream;

	##
	# SSL Settings
	##

	ssl_protocols TLSv1.2 TLSv1.3; # Dropping SSLv3, ref: POODLE
	ssl_prefer_server_ciphers on;

	##
	# Logging Settings
	##

	access_log /var/log/nginx/access.log;
	error_log /var/log/nginx/error.log;

	##
	# Gzip Settings
	##

	gzip on;
	gzip_disable "MSIE [1-6]\.";

	# gzip_vary on;
	gzip_proxied expired no-cache no-store private auth;
	gzip_comp_level 2;
	gzip_min_length 1000;
	# gzip_buffers 16 8k;
	# gzip_http_version 1.1;
	gzip_types text/plain text/css application/json application/javascript text/xml application/xml application/xml+rss text/javascript;

	##
	# Virtual Host Configs
	##

	include /etc/nginx/conf.d/*.conf;
	include /etc/nginx/sites-enabled/*;
}
nginx.conf configuration
If you compare the default config with this, it adds a few things.
- The worker_processes value is set from auto to 2, this value should correspond with how many CPU cores you have as a common practice.
- worker_rlimit_nofile value corresponding to the open file-max configuration previously.
- worker_connections value changed from 768 to 4096, you should know that the maximum concurrent connection value is determined like this:
(Max clients = worker_connections * worker_processes)
For my baseline configuration, it left me with an 8k limit that I believe is a good start to check if we should increase or decrease it depending on the system load and config. - multi_accept essentially allows each process to accept multiple connections as much as possible, this config relates to the worker_connections we set.
- use epoll is a newer, more optimized connection method with the newer Linux version.
It's essential to switch to it. - tcp_nodelay don't buffer data-sends, if you are sending a frequent small burst of data this setting is good to enable.
- The timeout setting is decreased from the default value so it going to terminate a long-standing request in case the application hangs, or issue with the scripts.
Keep in mind, that this value should correspond with how long is the limit for your scripts and application to run, don't take it as face value. - Added buffer optimization setting to override the limitation, also helps to prevent DDOS. But keep in mind the client_max_body_size also determines what your upload file size limit is.
- Enabling the gzip compression for static resources, so you don't need to send the whole file size whenever serving the content.
Setup Nginx Virtual Hosts
After you finish setting up the Nginx configuration, next we're going to set up your website virtual hosts settings. By default, Nginx has one server block configured to serve a directory at /var/www/html by creating new virtual host settings, you could easily manage and host multiple sites on a single host.
First, create a root web directory and set user permission for your_domain as follows:
sudo mkdir /var/www/your_domain/
sudo mkdir /var/www/your_domain/htdocs/
sudo mkdir /var/www/your_domain/logs
sudo chown -R $USER:$USER /var/www/your_domain
Next, create a new file in /etc/nginx/sites-available and you could name it with the domain name like /etc/nginx/sites-available/your_domain and include it with the config below.
server {
        listen 80;
        listen [::]:80;
        server_name your_domain www.your_domain;

        root /var/www/your_domain/htdocs/;
        index index.html index.php;

        location / {
                try_files $uri $uri/ /index.php$is_args$args;
        }

        location ~ \.php$ {
                include snippets/fastcgi-php.conf;
                # add param to handle retrieving domain name within php
                fastcgi_param SERVER_NAME your_domain;
                fastcgi_pass 127.0.0.1:9000;
        }

        # deny access to hidden files such as .htaccess
        location ~ /\. {
                deny all;
        }

        # If file is an asset then enable cache, set expires and break
        location ~* \.(ico|css|js|gif|jpe?g|png)(\?[0-9]+)?$ {
                expires max;
                break;
        }

        access_log /var/www/your_domain/logs/access.log;
        error_log /var/www/your_domain/logs/error.log;
}
Nginx virtual host configuration.
Enable your new configuration.
sudo ln -sf /etc/nginx/sites-available/your_domain /etc/nginx/sites-enabled/your_domain

sudo service nginx restart
Configure PHP-FPM.
After you finish configuring Nginx, next we are going to configure PHP-FPM.
Open php-fpm.conf in /etc/php/7.4/fpm/php-fpm.conf or change the 7.4 to 8.0 if you are using PHP 8 and change the following variables to this value:
emergency_restart_threshold = 10
emergency_restart_interval = 1m
process_control_timeout = 10s
Don't forget to remove ";" to enable the variables.
These settings tell php-fpm if the child processes fail within a minute, the main process forces them to restart. It's useful when handling memory leaks within a process.
For the /etc/php/7.4/fpm/pool.d/www.conf:
listen = 127.0.0.1:9000
pm = static
pm.max_children = 16
pm.max_requests = 2000
I found out that using TCP sockets, rather than Unix ones like the default configuration for the listener, allows more flexibility and solves compatibility issues if I want to use something like a custom SERVER_NAME value or use the built-in fpm status monitoring.
You also may notice I am changing from dynamic process management to static, and for that, I refer you to read more about using pm static from the wonderful article by Hayden James.
https://haydenjames.io/php-fpm-tuning-using-pm-static-max-performance/
Configure php.ini.
You could safely skip this part if you think the default configuration is enough, but there are a few things that you should know when setting up your application.
The default path for the file is /etc/php/7.4/fpm/php.ini
- display_errors
This directive allows you to control whenever you want to show errors displayed on the screen during the script execution, for production use, this value should be turned off to prevent showing unexpected vulnerabilities. - error_reporting
This directive allows you to set the error reporting level, accepting a constant range of E_ALL, E_NOTICE, E_STRICT, E_DEPRECATED.
For example, if you want to set it to E_ALL to show all types of errors. - file_uploads
As the name says, this directive allows you to enable/disable HTTP file uploads, if your site doesn't need file upload functionality, you are safe to disable this. - upload_max_filesize
If you enable file upload, this directive allows you to increase or decrease the size of file uploads, the default value is 2MB. - post_max_size
This setting allows you to control the maximum size of a POST request, and if you enable file upload,s this directive needs to be higher than the upload_max_filesize value. - memory_limit
This allows you to set a maximum limit of memory that your script allows to allocate and use, you may want to fine-tune this depending on what your application nee,ds because if you set it too high, poorly written or buggy scripts could consume all the memory your server has. - max_execution_time
This directive allows you to set a maximum amount of time scripts are allowed to run, the default is 30 seconds, similar to the memory_limit, please tune and set this value as needed to avoid issues on buggy scripts. - max_input_time
This directive allows you to set the maximum amount of time a script is allowed to parse incoming form data from a GET or POST.
Validate Installation
After thoroughly following all the installation steps, now let's test and validate our installation to make sure everything works okay.
- Create a PHP info test file by creating one in /var/www/your_domain/htdocs/info.php
with the following content:
<?php
phpinfo();- Access your test file by visiting your public website domain or IP address
http://server_domain_or_ip/info.php - Your site display output should be like this:
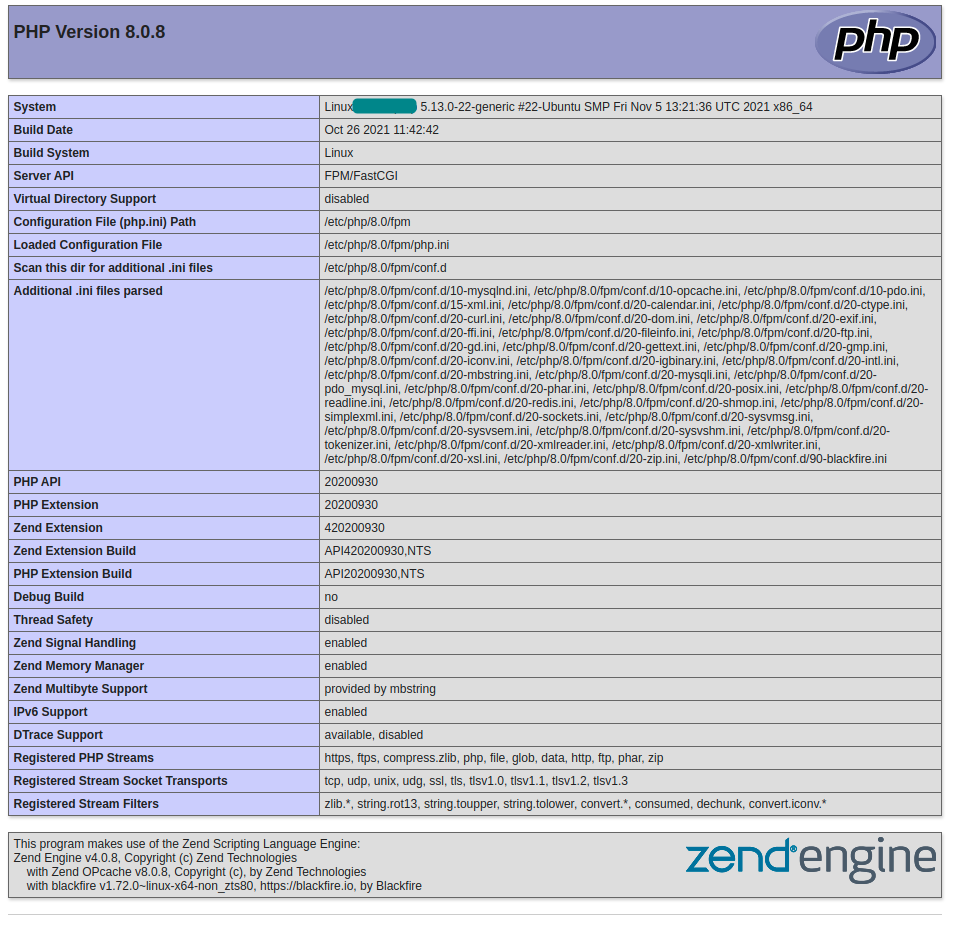
- If the output looks the same, then Nginx and PHP are successfully installed.
Now remove the info.php page to prevent unauthorized disclosure.
Conclusion
With that last step, now you know how to set up a LEMP stack with a good baseline configuration for production usage. There is always a good next step after installing, like configuring SSL with Let's Encrypt or uploading your own SSL certificate, configuring a PHP opcache, tweaking MariaDB configuration, and more.
But that's for the next time.
For now, pat yourself on the back and treat yourself to some coffee or tea!